Saturday, June 30, 2012

DIY Lanyard


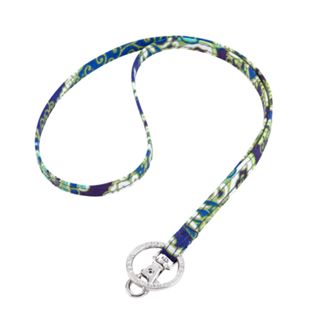
Since I'll need a lanyard for my ID next year, I started looking. I fell in love with these from Vera Bradley, but refused to pay $12.
Upon more thought, I realized, Hey! these don't look to hard to make! I even have some fabric that's really close to the lanyard pictured here.

So, with that in mind, here's your supplies:

  • scrap fabric (I used duck cloth because it's durable. I wouldn't recommend knit at all. You can use cotton, but a thicker fabric is best.
  • lanyard clip ( I clipped mine off a key chain I wasn't using - talk about thrifty crafting! - but most craft stores carry them, I imagine they'd only be $3 or so).

That's seriously it! These things cost so little since you're using scarp fabric, mine came in for practically free! Beats $12 any day.

Anyway, the first thing you want to do is cut a 37 in. by 2 in. piece of fabric. A rotary mat and cutter works wonders for this. Don't worry if your lines are jagged, they'll be hidden.


Next, break out the ironing board. Iron your fabric in half to get a nice crease line.


Unfold your fabric, and press one end into the center. Do this on both sides.


Now fold the piece in half as to hide the raw edges. Press (don't worry - this is the last of the ironing).


Pin along the non-folded side. Now, hop over to your sewing machine. Sew straight up your pinned side. Have as little seam allowance as possible.


After that, straight stitch the ends, and then sew them together. Loop your fabric through your lanyard hook, and sew.

And that is that! It really doesn't take that long at all!

If you're looking for something to put on the end of the lanyard, check out this tutorial. It's an ID case, another Vera Bradley knock off. It's up next on my sewing list.

Don't know if you noticed my nails or not - it's one of my favorite colors, Cream Pink by Sinful Colors. It's only $2, and really high quality

.                             

Keep Crafting
-K


Saturday, June 23, 2012

Money Jars

While hanging out with a friend of mine one day, she started talking about these neat savings jars she made. Intersted, I asked her to show me. They were so stinking cute!!! Upon closer look, they also looked super easy. I asked her how she made them and after the run-around, she came up with the idea of a blog post. So, I did.

Most of the supplies are available around your house.

  • small mason jar
  • duct tape (colored is best)
  • scrap fabric
  • permanent marker
  • scissors
First, take the duct tape and wrap it around the jar, making sure to keep the tape straight and to create minimal air bubbles.


Next, remove lid and take 2 strips of fabric, placing them with a slight gap between.


Place lid back on. It's easier to do if you hold the fabric taught to the sides. Trim fabric to desired length.


Finally, label the jar. These can be great tools to teach your kids money management. Make three for spending, saving, and giving.


And volia! you're done (didn't I tell you they were cute)!

Keep Crafting,
-K

Linked to:

Saturday, June 16, 2012

Easy "Quilted" Bookmark


I was recently trying to come up with some cheap, easy gifts that almost anyone can use. These bookmarks are super easy and quick to make.There really is no quilting involved, you just add interest by using your machine to add lines all over the bookmark. Super simple!


All you need is scrap fabric, 3 in. of ribbon, and some contrasting thread. You'll want some cotton for the front of the bookmark, and some duck cloth or canvas for the backing.
Cut out a 2 in. x 5 in. piece of your front and back fabric. If you want to, add a little basic embroidery, like the initials of the recipient. Place wrong sides of the fabric together, and sew around 3 sides.


Flip right side out, and stitch up the top, placing the ribbon - folded in half - in the center. You can hand stitch the top - which yields MUCH better results - or machine stitch. If you hand stich use an invisible stitch for best results. Get a how-to here.
Finally, "quilting." You can do absolutely any design. I chose something basic and easy, criss-cross lines. Instead of trying to do straight lines and having them come out horribly, I just did crooked lines all over.

                                       
And you're done! I might just make one for myself...

Keep Crafting,
-K

Monday, June 11, 2012

FOOD BREAK!!!


I have to admit - I had a planning backfire. This is supposed to be week 4 on redoing your shirts, however, while traveling, I wasn't able to put the post together. My apologies. In the meantime, food is always good.


Within this blog lies 3 of my favorite ingredients, combined into one amazing food. This smoothie is great for breakfast, or even a snack.

Ingredients:

  • 1/2 cup milk
  • 1 small ripe banana
  • 1/4 cup Peanut Butter 
  • 2 tablespoons honey
  • 6 ice cubes
Directions:

1. Place ingredients in blender

2. Blend until smooth

3. Enjoy ;)
Keep sippin'
-K


Friday, June 1, 2012

Week 3 - Redo your shirts: Turn a tee into a razor back

You know those free shirts you get with the only purpose of painting shirts, until you have more painting shirts then rooms in your house? Yeah....I had my share of those, too. Well, you can easily turn them into some razor back tops. I find these work great as work-out shirts here in the South. It doesn't take long at all. All you need is an old tee, preferably one that's slightly big, and a pair of scissors.

First, cut off the neck edging.


Then, cut off the shirt sleeves.


Next, trim the shoulders to about 4 inches.

Take a scrap piece of fabric and pull gently from both sides. The fabric should curl up.


Finally, pull scrap piece around the back of the shirt, wrap around, and tie.

Simple as that!

Keep crafting-
-K


Related Posts Plugin for WordPress, Blogger...